Showing posts with label Halloween. Show all posts

Making Adorable Ghost Art From A Squeegee


   On behalf of spooky season, it's so much fun to make different crafts surrounding this time of year! So let's grab a squeegee and make the super adorable SqueeGee Ghost! All you need for this is paper, paint, a squeegee, and a marker. I found this idea over at The Craft Train. Mine looks nowhere as cute as there's haha... Feel free to watch their video on how to make these fun lil guys! 

   You begin by using two different colored paints to make the outline of the ghosts head and arms, and use black for the eyes and mouth. I found that it works much better to use black permanent marker for the eyes and mouth, so it doesn’t run paint, like it did on the purple paper one. 

   Start your squeegee at the top and pull it down the paper, to make your ghost! Then take a white marker to outline the ghost and draw in any details you might want, let the paint dry, and it's all ready for display! Pair this craft with a fun book! 

Super cute and great for any age. 


Halloween Garland DIY Made From a Recycled Sephora Store Bag

  
  I love to decorate for the holidays, but before I spend money on new items, I like to shop the house to use what I have on hand, or craft up the item I have in mind. This not only saves money, but it’s also more environmentally friendly! I recently made a trip to Sephora for some splurgy beauty products, and had their bag ready to recycle. I thought it would make the perfect striped Halloween Garland, so I gathered the supplies I’d need for the garland, and got to work. 

   I decided to have my garland say “Get Spooky” so I cut out the 9 triangles needed. Then I painted a letter on each triangle, using paint I had on hand, and strung them across some embroidery thread. I folded the tops over and secured them onto the string, using tape. A quick, easy craft, and 
I think it turned out so cute! 


DIY Tombstones for Halloween Decor


   If you're looking upon some easy DIY Halloween Decor you can make from recyclables, check out these fun Tombstones made from cereal boxes!

   To make these faux stones, you need cereal boxes, scissors to cut the shape, tape to hold it down, and paint. You begin by cutting the front and back of the box, to make a round top. Make sure to leave the sides, so you can fold them down into the the top to form the round edging. Once formed, tape the tops, and you can begin painting! I used silver spray paint and then went over it with a Terra Cotta grey color of acrylic paints, because that's what I had on hand. 

   I think these would look even better with the stone textured spray paint, but use whatever you have on hand, to make this project cheap and easy! Once the faux stone-colored paint dried, I used black acrylic paint to write the words R.I.P. and Rest in Peace. Feel free to write something more clever if you make your own 🤣

    If you look at the stones closely, I feel like I did a pretty sloppy job, but they still turned out cute! These tombstones make some fun indoor Halloween decor for your house, and you can dress them up any way you like. I wouldn't recommend putting them outside, unless you live in a warmer dry climate, but they would look awesome as front yard decor! 

    If you decide to entertain yourself and make these fun little tombstones, please feel free to let me know! I would love to see how they turn out! 🤍


Feasting On Adorable Little Skeleton Head Cakes

HAPPY OCTOBER!!! 
 
My favorite month, because Fall is here, and it's my Birthday Month! ☺

   And with October here, that means Halloween is near us, so what better way to celebrate, than to make mini skeleton head cakes! This pan is amazing; made heavy duty of cast iron and cooks everything evenly. You have to oil each section, and then apply a light sprinkling of flour, before adding in the batter to bake. This helps the cakes ease out of the pan once done. The skeleton heads turn out so cute, you can leave as is or decorate with frosting and candies. There are so many possibilities you could do with these cakes: decorate them for parties, hold a cake decorating contest, make a fun charcuterie board, these cakes would even be good for Dia de Los Muertos! But ultimately, you can enjoy this design any time of year because why not?! They're just too cute!

Celebrate Lights Up Mini Halloween Pumpkin

Disclaimer: I received the following product(s) in exchange for my review. All opinions my own. 


This adorable little pumpkin brings a lot of character in it's lit up jack-o'-lantern smile. I love that it's affordable and that the batteries are included, so it's ready to go when you get it. The plastic it's made of is very thin and lightweight, so I worry if it falls it will easily break, but if it's just sitting looking cute, it should last through the season. I love seeing its face lit up on my mantle, because it just looks so cheery! And if you don't want to see the face, just turn it over to the other side! It's a great piece to have through the Fall.

Popsicle Stick Pumpkin Craft


    Fall is a great time for crafting up all the pumpkin, leaf, and cozy things... So why not make this adorable little Popsicle Stick Pumpkin Head! It's easy for all ages and adds an extra cute touch to your Fall decor.

 To make this craft, you need the following supplies:

Glue

Big Googly Eyes

Orange Popsicle Sticks (at least 5)

Green Popsicle Stick (or other item) for the stem


Design your pumpkin head and glue all the pieces in place, let dry, and admire its cuteness!


Halloween Movies to Watch With Your Tween


   Watching one Halloween movie a day again, for the month of October!! Here is a list I conjured up, of Halloween movies me and my tween will be watching this month!! Enjoy!


Splenda Naturals Sugar & Stevia Sweetener Blend

 Disclaimer: I received the following product(s) in exchange for my review. All opinions my own.


   Baking season is right around the corner which means lots of sweets will be consumed! But what if you could bake goodies with 50% less calories then usual? With Splenda Naturals Stevia Sweeteners you can enjoy sweets at a lighter balance with half the amount of calories that sugar contains. This sweetener is made with pure cane sugar and stevia leaf extract and contains non-GMO ingredients and no added flavor or colors. Every 1/2 teaspoon of this blend is the equivalent to one full teaspoon of traditional sugar, making it last longer as less is being used! Just think of all the goodies you can make with this!


   In the past, I have never been a huge Splenda fan because it always left a bad aftertaste. I was pleasantly surprised with the Splenda Naturals sweetener, as it tastes amazing and there wasn't any bitter result. This is from Splenda's specialized Reb D blend, much different from their original Reb A blend. You can truly taste the difference! I have made several treats using Splenda Naturals so far...some of those include Easy Sugar Cookies, Lemonade, Apple Tisane, and Cinnamon Cake. I have enjoyed every single recipes I've used this product in. I find the sweetener dissolves extremely well in liquids, and mixes perfectly in batter. And the only aftertaste I'm getting is the ultimate sweetness! I love that I can use less of this sweetener in all my recipes so it doesn't get used up so quickly. I can't wait to see all the sweets I come up with during the Holiday season!


You can find Splenda Naturals Sugar & Stevia Sweetener Blend available for purchase in stores near you including Walmart, Acme, Food Lion, and Weis Markets. Also be sure to visit splenda.com for more products and information, as well as recipes!


 I received this product for free from Moms Meet (momsmeet.com), May Media Group LLC, who received it directly from the manufacturer. As a Moms Meet blogger, I agree to use this product and post my honest opinion on my blog. The opinions posted are my own.


Vanilla Bean Blondies + Recipe


Are you looking for a simple yet delicious recipe to make today?
You've come to the right spot! Below I will share with you how to make easy Vanilla Bean Blondies!

First you need the ingredients:


1/2 Cup of Butter, melted
1 Cup Sugar
1 Egg
1tsp Vanilla
1/2 tsp Baking Powder
1/8 tsp Baking Soda
Pinch of Salt (optional)
1 Cup of Flour


Preheat oven to 350 degrees Fahrenheit and lightly grease an 8x8 or 8x13 pan.  I use 8x13 and like the way mine come out. Not too thick and not too thin. If I were to be fancy, I would tell you to whisk the butter and sugar together, then add in the egg and vanilla while slowly adding in the dry ingredients, but let's be honest...it works just as well, throwing all the ingredients into one big bowl and mixing it well. That's how I do it anyways.

If you want your blondies to be extra moist, you can add in a pack of Jell-o's Simply Good Vanilla Bean Instant Pudding Mix! I did this and they came out extremely moist, almost gooey like. But it's perfect even without that add on. Once your ingredients are all mixed together, pour the batter into your greased pan, add in any sprinkles if you want, and place into the oven for about 20-30 minutes. The time really depends on your oven, so keep aware of the smell and golden brown top of your blondies. Test the middle with a toothpick and if it comes out clean, the blondies are done and ready to cool! They come out tasting delicious, moist, and slightly chewy. They are a family favorite! 


If You Care Cupcake Liners + Christmas Cupcake Decorating

 Disclaimer: I received a following product(s) in exchange for my review. All opinions my own. 


I had the opportunity to review and hold a cupcake decorating party for the If You Care Baking Cups. Despite the plain brown paper bag color, I love these liners as they do really well in baking cupcakes or muffins! 


 In making my cupcakes, the breading didn't stick to the paper when being pulled off. This is great because a lot of cheaper liner products tend to stick making a huge mess. These ones were great! They also don't have any papery smells, and leave your cupcakes tasting as they should.


 They are such a great product! I can't wait to try the liners in making meatballs. I want to test how grease-proof they are! I would love if they were available in different colors/designs, but otherwise, they are a great product to work with. 

Here are our beautiful Christmas cupcakes we made awhile back!
 So much fun! 


I received this product for free from Moms Meet (momsmeet.com), May Media Group LLC, who received it directly from the manufacturer.
As a Moms Meet blogger, I agree to use this product and post my honest opinion on my blog. The opinions posted are my own.

Light Up The House With LTE 20 LED Copper Wire Lights

Disclaimer: I received the following product(s) in exchange for my honest review. All opinions my own.

Christmas has come and gone, and the New Year's Celebration has passed too...but that doesn't mean you can't have twinkling lights up all year round! 

The LTE 20 LED Copper Wire Lights are beautiful sparkling lights that look good at any time or place. Each box comes with a set of 4 short length wire lights, making them easy to use and place anywhere in the house. They are bright and beautiful, and include batteries so they are ready to use once you get the box open. I have already placed three of lights up around miscellaneous places in the house, and they look amazing! The on/off switch is easy to move and the lights stay cool to touch. My only worry is how long will they last, and how hard will it be to find battery replacements. But until then, I am in love with these little lights and how bright they shine. They work perfect, above doors, as decor, they're even bright enough to add some light to an otherwise dark closet. You can see in one of the photos I posted, I have the lights in my closet and they really brighten the area. If you're looking for some small, easy to use battery operated lights, I highly recommend these!


Hang them in your bathroom, bedroom, living room and more! Find the LTE 20 LED Copper Wire Lights available for purchase on Amazon at a great price!


I received a complimentary product in exchange for my honest review. All opinions my own.

Getting Ready For Halloween With #Tryazon and #GetUnreal Candy!

 Disclaimer: I received the following product(s) in exchange for my review. All opinions my own.

    With Halloween just around the corner, everyone is running to the store to pick up candy for all the trick or treaters! Reeses, Snicker Bars, Twix... though delicious, these candies are filled with many not so healthy ingredients. So why not buy a better option? The Unreal candies are just as good, and filled with ingredients that are better for you. Plus they do not contain any GMO's, Artificial Colors, or Preservatives, and they are Fair Trade and Gluten Free! Candy that tastes great and is so much better for you.
 

    With Tryazon and Unreal Candy I hosted a super fun party to get into the Halloween Spirit. Me and my guests had a Costume Movie Night, and enjoyed lots of delicious and healthy candies! We had the Original Milk Chocolate Peanut Butter Cups, as well as some new ones including Milk Chocolate Crispy Quinoa Peanut Butter Cups, Dark Chocolate Coconut Peanut Butter Cups, and little Candy Coated Milk Chocolate Gems. These candies are delicious! Very rich and creamy, they will leave you wanting more. I love that Unreal brings a healthier option to candies, and hold a variety of flavors to choose from. They are so good, look for them in a store near you, and fill that bowl with Unreal Candies for your own trick or treat stash this year!
 

You can find more information on Unreal products at getunreal.com 
You can also find them on Facebook, Twitter, Pinterest, and Instagram.


This post is made possible by Tryazon, in providing me the products to review. All opinions my own. 

31 Kid-Friendly Halloween Movies To Watch Together

Me and my son decided to start a fun tradition of watching a Halloween movie every night for the month of October, up until Halloween. We will enjoy a new movie every night, with snacks to enjoy with our film. Here is a full list of 31 child friendly movies to watch, all month long!

~*~*~*~*~*~*~*~*~*~*~*~*~

  1. Igor
  2. Casper
  3. Coraline
  4. Vampire Dog
  5. ParaNorman
  6. Goosebumps
  7. Dear Dracula
  8. Spirited Away
  9. Monster House
  10. Spooky Buddies
  11.  Frankenweenie
  12.  Halloweentown
  13. Liar Liar Vampire
  14. The Little Vampire
  15. The Halloween Tree
  16. Hotel Transylvania
  17. Hotel Transylvania 2
  18. Kiki's Delivery Service 
  19. Monsterous Holiday
  20. Monsters Vs. Aliens
  21. The Haunted Mansion
  22. Pac's Scary Halloween 
  23. Dreamworks Spooky Stories
  24. Spookley The Square Pumpkin
  25. The Dog Who Saved Halloween
  26. The Nightmare Before Christmas
  27. Curious George Halloween Boofest
  28. It's The Great Pumpkin Charlie Brown
  29. The Adventures of Ichabod and Mr. Toad
  30. Wallace & Gromit The Curse of The Were-Rabbit
  31. Scary Godmother Halloween Spooktacular
 
Enjoy your month long Halloween Movie Watching!

Making Candies With The Gummy Bear Silicone Candy Mold


Disclaimer: I received the following product(s) in exchange for my review. All opinions my own. 

If you love Gummy Bears than this is the gift for you! You can make your own homemade Gummy Bears from the Comfort of your home! With this Gummy Bear Candy mold, you can make many bear shaped yummies. Whether it be gummies, chocolates, homemade vitamins, ice cubes, ect., you can save money and have a lot of fun making them.

   The Gummy Bear Silicone Candy Mold makes 50 normal size gummy bears and it comes with an easy fill dropper so you can drop liquid into the bear molds, without making too much of a mess. The Mold itself is made of FDA approved highly durable silicone that is free of Phthalates and BPA so you can feel safe using them time after time. Once you are finished making gummy bears, you can either handwash the molds, or toss them
in the dishwasher for an easy cleanup.

 
   Making Gummy Bears is perfect for parties, snacks for your children, or just fun to make for any season. My husband LOVE's eating Gummy Bears/Gummy Worms Frozen, so I thought it would be fun to make him homemade versions, even healthier ones using real fruits and veggies.
 

My first attempt at using the bear mold, I decided to freeze chocolate pudding. It was simple enough and the little bears came out adorable!! The only downfall was that the bears melted too quickly. It would work much better with chocolate. And even better with gummies! This will be so much fun for future parties, snacks, and just because treats. The little bears will also make adorable packed lunch surprises, hiding throughout. This is such a fun little mold, a great addition to my other fun food shaped items!
   
You can find the 50 Cavity Gummy Bear Silicone Candy Mold available for purchase on Amazon for $10.99 in the choice of the color blue or orange.


I received one or more of the products mentioned above for free using Tomoson.com. Regardless, I only 
recommend products or services I use personally and believe will be good for my readers.

Making #AirheadCrafts With Smiley360

Disclaimer: I received the following product(s) in exchange for my review. All opinions my own. 


As a member of the Smiley360 club, I received a super fun mission to make edible crafts using Airheads. You know what Airheads are right? The childhood candy, full of chewiness and tang. Those taffy like strips you may or may not have pretended were long tongues when you were a kid....

Airheads add a fun and colorful touch to any craft-able food item. And the awesome thing is, they are gluten free and peanut free, so they are a safe go to for children with allergies! You can use Airheads to mold, cut, and shape into all kinds of things, adding the little extra pizzazz to your project. 

I never realized just how hard molding Airheads would be, until I experienced it first hand. After seeing all the craft ideas, I thought it would be a piece of cake...boy was I wrong! So our little Airhead Crafts didn't come out as cute as I hoped, but me and my son had a lot of fun making them!

We attempted a couple things, as you can see....

On the top row, my son made: A scarecrow, a Popsicle, and a Monster.
On the bottom row, I made: A Turkey, a Face topper for a cookie, and an easy ribbon. 

What would you make if you crafted with Airheads? 
Click HERE to see some of the cute ideas you could make!

Visit Airheads on Pinterest, Instagram, Facebook, and Twitter 
where you can find more ideas and fun!!


 I participated in this mission as a member of Smiley360, and in return I am entered into a sweepstakes.  
No compensation has been involved. All opinions are my own.

Neighborhood Halloween Fun and Trick or Treating With Friends

Our Halloween was great! Our son was invited by one of his classmates, to go to their Halloween Party so we went there this year. We usually pick a nice neighborhood to go trick or treat in, or just trick or treat at the mall so this year was a nice change. On our way to the party, we ended up getting lost because someone had actually taken down the street sign for where we needed to go!! But after a few minutes and some Google mapping help, we finally found it :)

They supplied snacks and games. The kids got to play pin the tail on the ghost and felt all different odd things to guess what they were. (similar to my monster in a box game) They felt jello, rubber duck, a snack, eyeballs, ect. The kids then decided to have a mini tackle with each other lol. They seemed to be having a lot of fun, while the adults chatted, sipping on Apple cider.

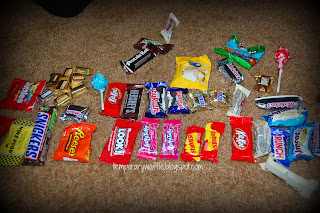
After a bit, we wrapped up and went trick or treating in their neighborhood. The kids were so ready to get out and get some candy haha. It was a surprisingly warmer night than usual because it's usually really cold and rainy on Halloween. We went from house to house, kids got a lot of candy-a bucket each lol. 


 It was a good night, even lil man kept saying : 
"This is the best Halloween ever!"